 |
| We were provided with free product. This post will contain affiliate Links. |
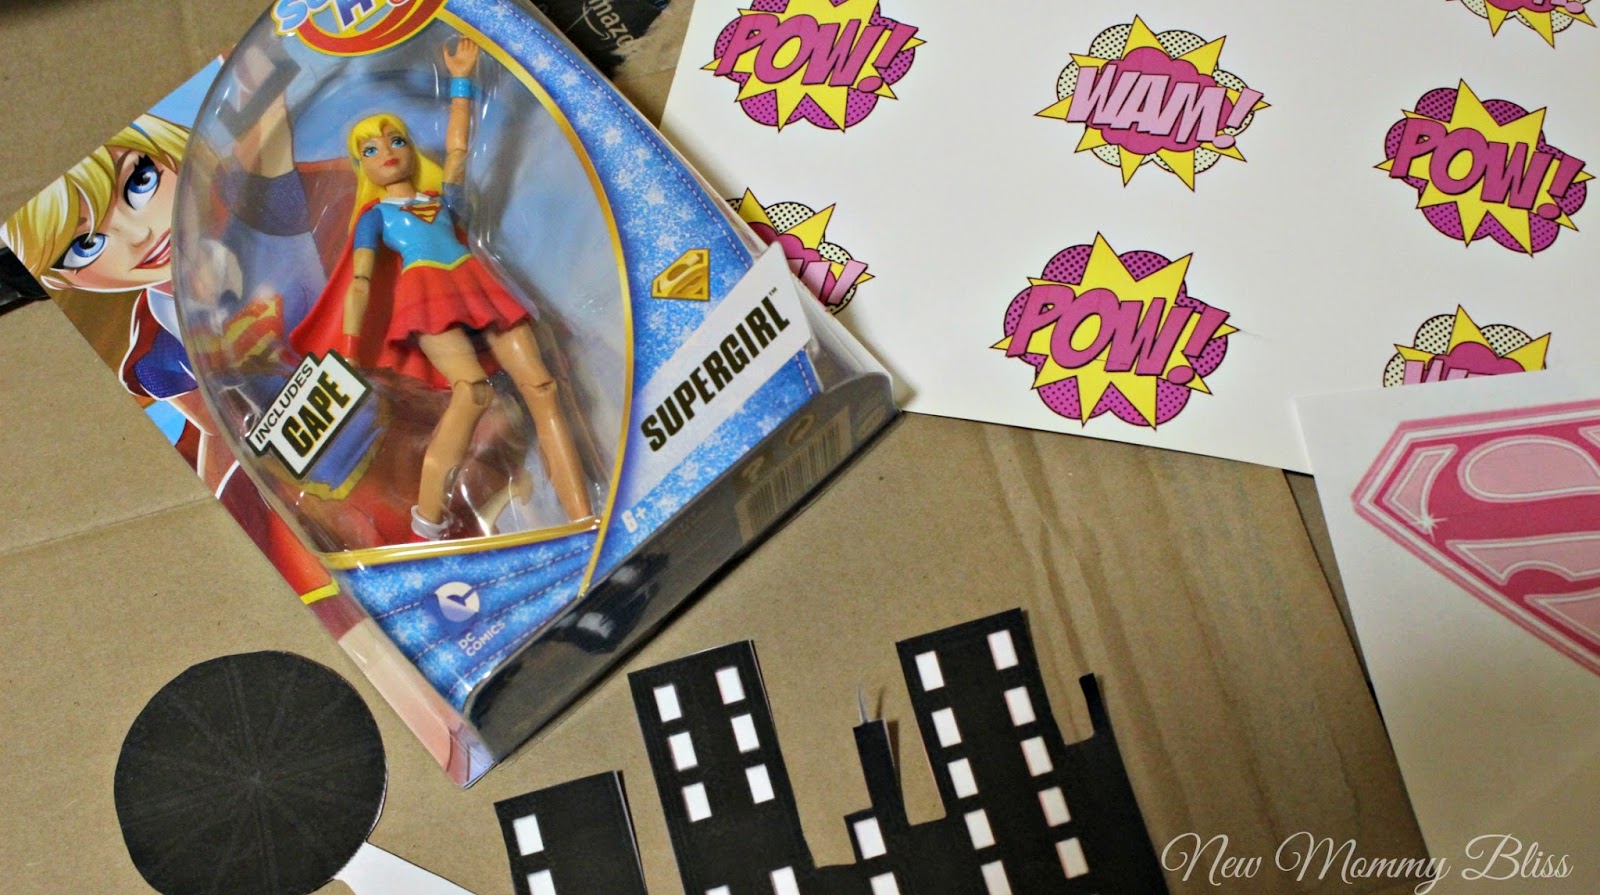
1. I gathered all of my supplies. Because I wanted everyone to be able to view the “city” from the front and the back of the cake, I printed one out and then flipped the image in a photo editing software (picmonkey.com). I then printed out the second page.
* The city came out a little short Height-wise so I had to add more cardboard and black paper to give it some room to insert into cake.

*You can use either side since you are only cutting out one piece and gluing one image to each Side.
** I forgot to take a picture, but if you are using a Logo (Superman, Supergirl, Batman, Batgirl, etc.) Be sure to glue it to the circle and cut the cardboard around that.

3. For the Gluing, I used Mod Podge (GLOSS) and it worked AMAZINGLY at sticking everything together and making it shine! After gluing it and letting it dry, I Mod Podged the entire image. Make sure the ink is completely dry or it will bleed out onto the white spots quickly. Once that is dry (about 5 minutes) add Mod Podge to the white space leading up to the logo and add your preferred color sugar or sprinkles!
* The sprinkle is optional, but gives it an amazing “light” affect

4. The Image was a little short so I added more cardboard and black paper to be able to stick it into the cake, yet have it still be a bit higher than the DC Superhero Girl.
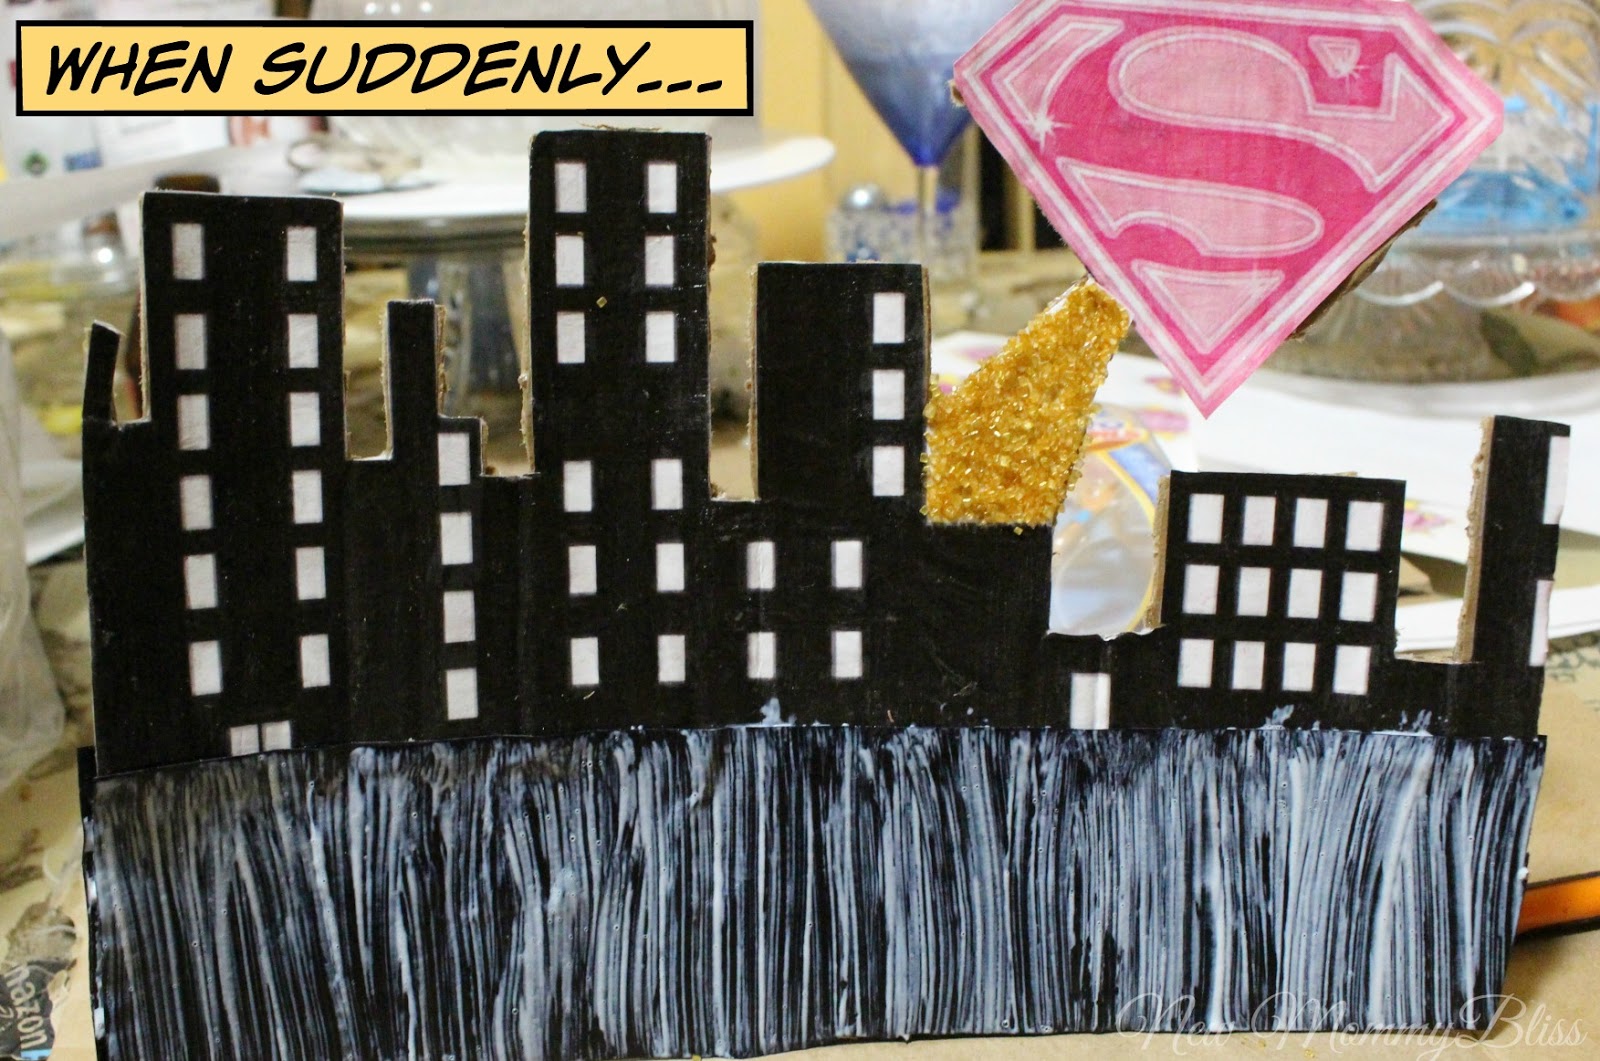
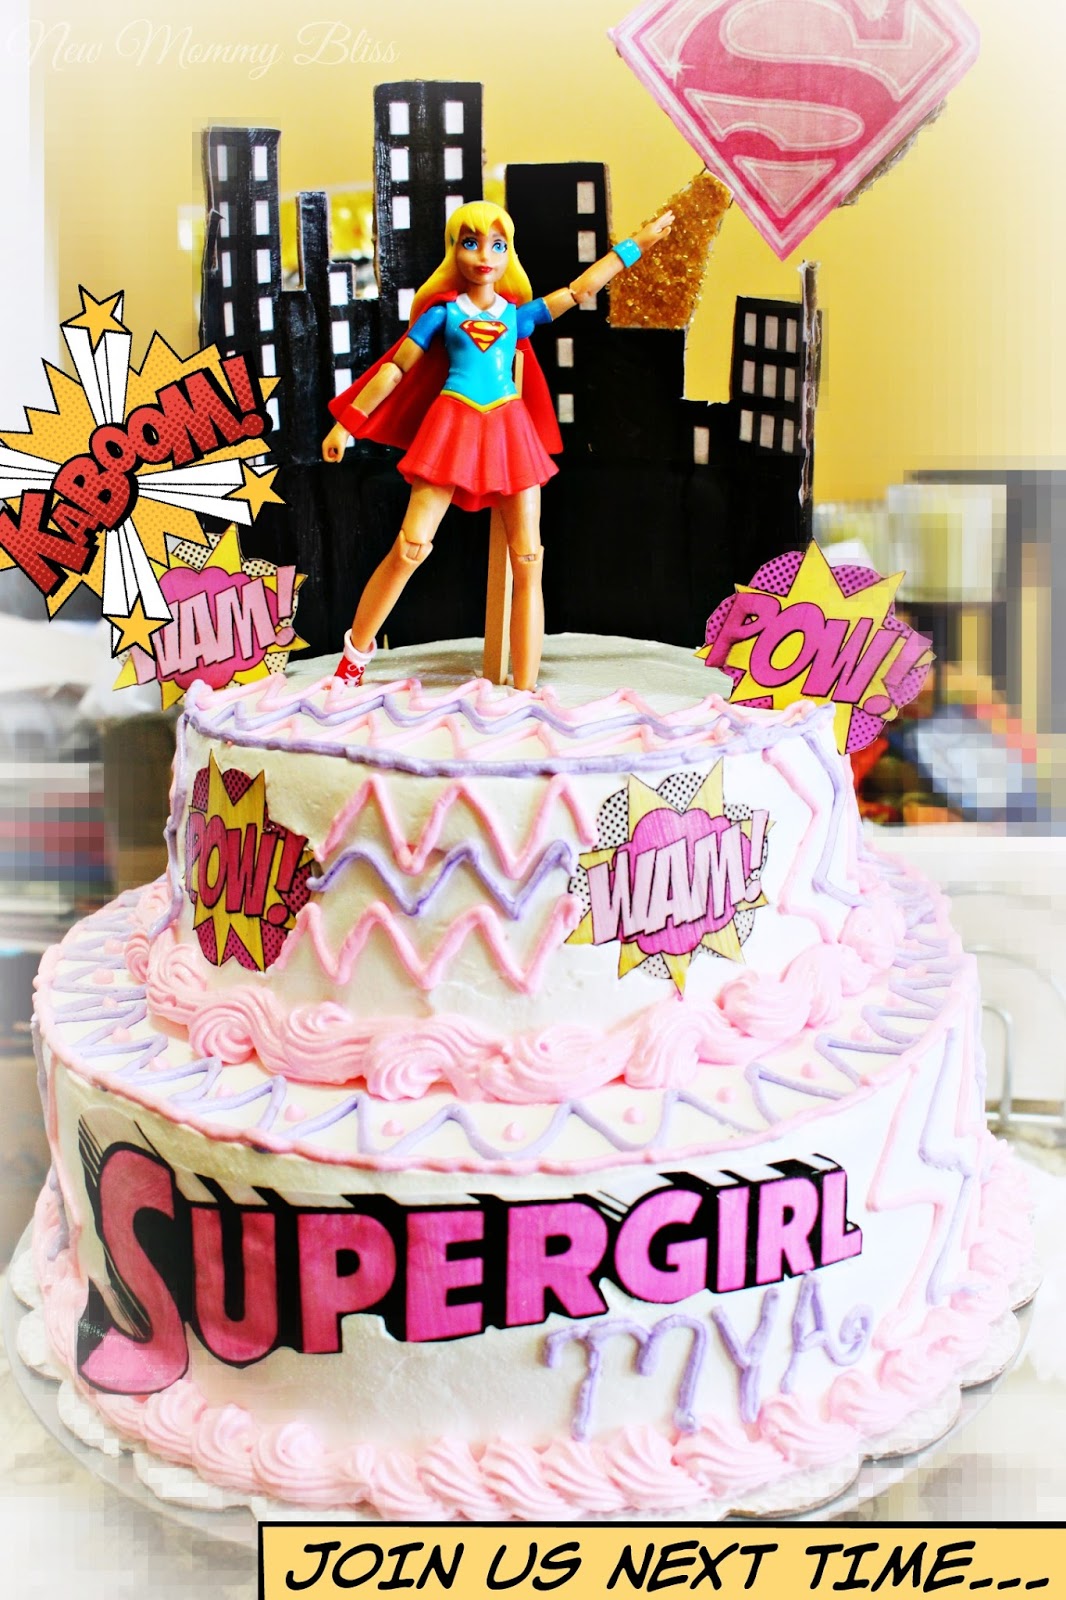
5. After your Cityscape is done, Apply Mod Podge to your Superhero Butt Kicking logo (POW! WAM! BAM! ZAPP!) Let it dry and Set Aside. Now Bring out your Cake!
6. We Started with a white frosting as the base, but you can use what ever color suits your theme! As long as your cake designs are Bright & contrasting colors, It’ll look amazing. I forgot to take a picture, but we started with a 2 Layer White frosting based cake.
7. Add the City Scape and secure using toothpicks in the back and Front of the city. Add Your Superhero logos spaced out accordingly onto the cake. It should be in a way where you can decorate in between. I Found that Zig Zags and Dots are the Ultimate “Comic-Style” designs and they are super easy to replicate.
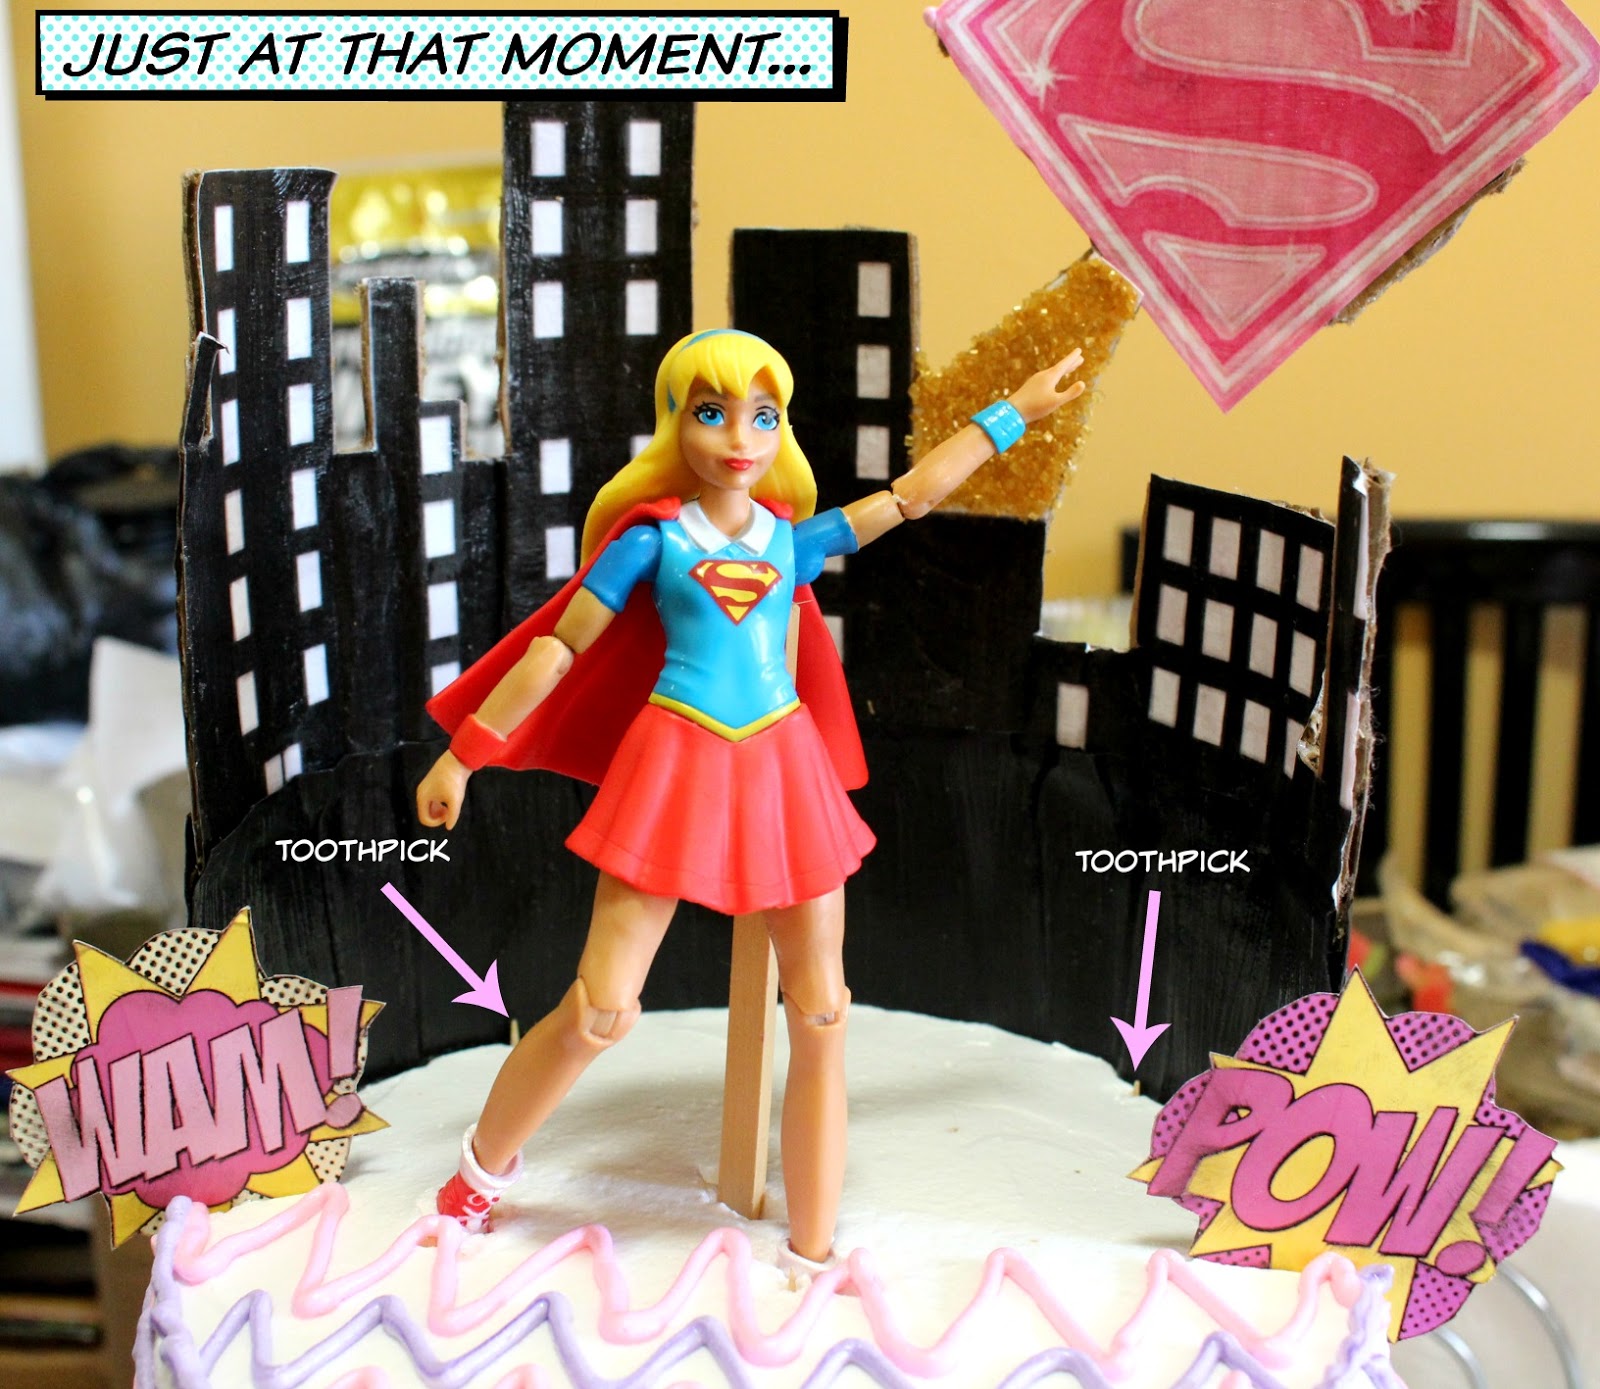
8. After Zig-Zaging and adding the simple edges, I Added our DC SuperHero Girl! She usually stands on her own, but it was hard on top of a cake. We used a Stick that matched her skin tone and placed it in the cake AND behind her cape. I then decided to add a Supergirl Sign in a rather diagonal manner. Added the Super Birthday Girl’s Name and Voila!
To learn more about the DC SuperHero Girls and all the products associated , you can check out the site. If you have any Questions, do not hesitate to ask in the comments below!


OK the next time I'm in NY you have to make a cake for us. I am loving this and can you believe that I haven't seen that Supergirl show yet, but I've heard lots about it, and I think I'm more of a Marvel fan than DC.
I'm with you on that One! For the Super Hero Boys, I prefer Marvel. For the Super Hero Girls I prefer DC
Your cake turned out great. I'll bet it was a big hit at the party.
WOW! Your cake is amazing and you did a great job! My daughter would love for me to make a cake like this one. I am inspired to try out your cake idea!
Looks so cute. I love this cake
I would enjoy making this cake for the grand daughters.
Thanks for the post!
Wow, amazing cake, you are so creative. You should have your own bakery 🙂
Well this is a really great idea for a birthday party
This turned out so great! What a creative cake!
Love how you got the pow and whm in too cool. I love all the neat additions you made
ellen beck
Wow! This turned out super cute!!! I want to make a super hero cake for my nephew, he'd love it. You did an awesome job!!
Real informative and fantastic anatomical structure of subject material , now that’s user pleasant (:.
cupcake decorating